 Salmonberry Inn, Anchorage: One Frame, and How It Is Made
The Aurora Ice Museum, Fairbanks: One Frame, and How It Is Made
Everything in the room is blue. Make them the only warm thing in it.
This guide is about a single photograph, and it depends on a material condition that exists at almost no other venue on the planet: a room whose walls are translucent and lit from within.
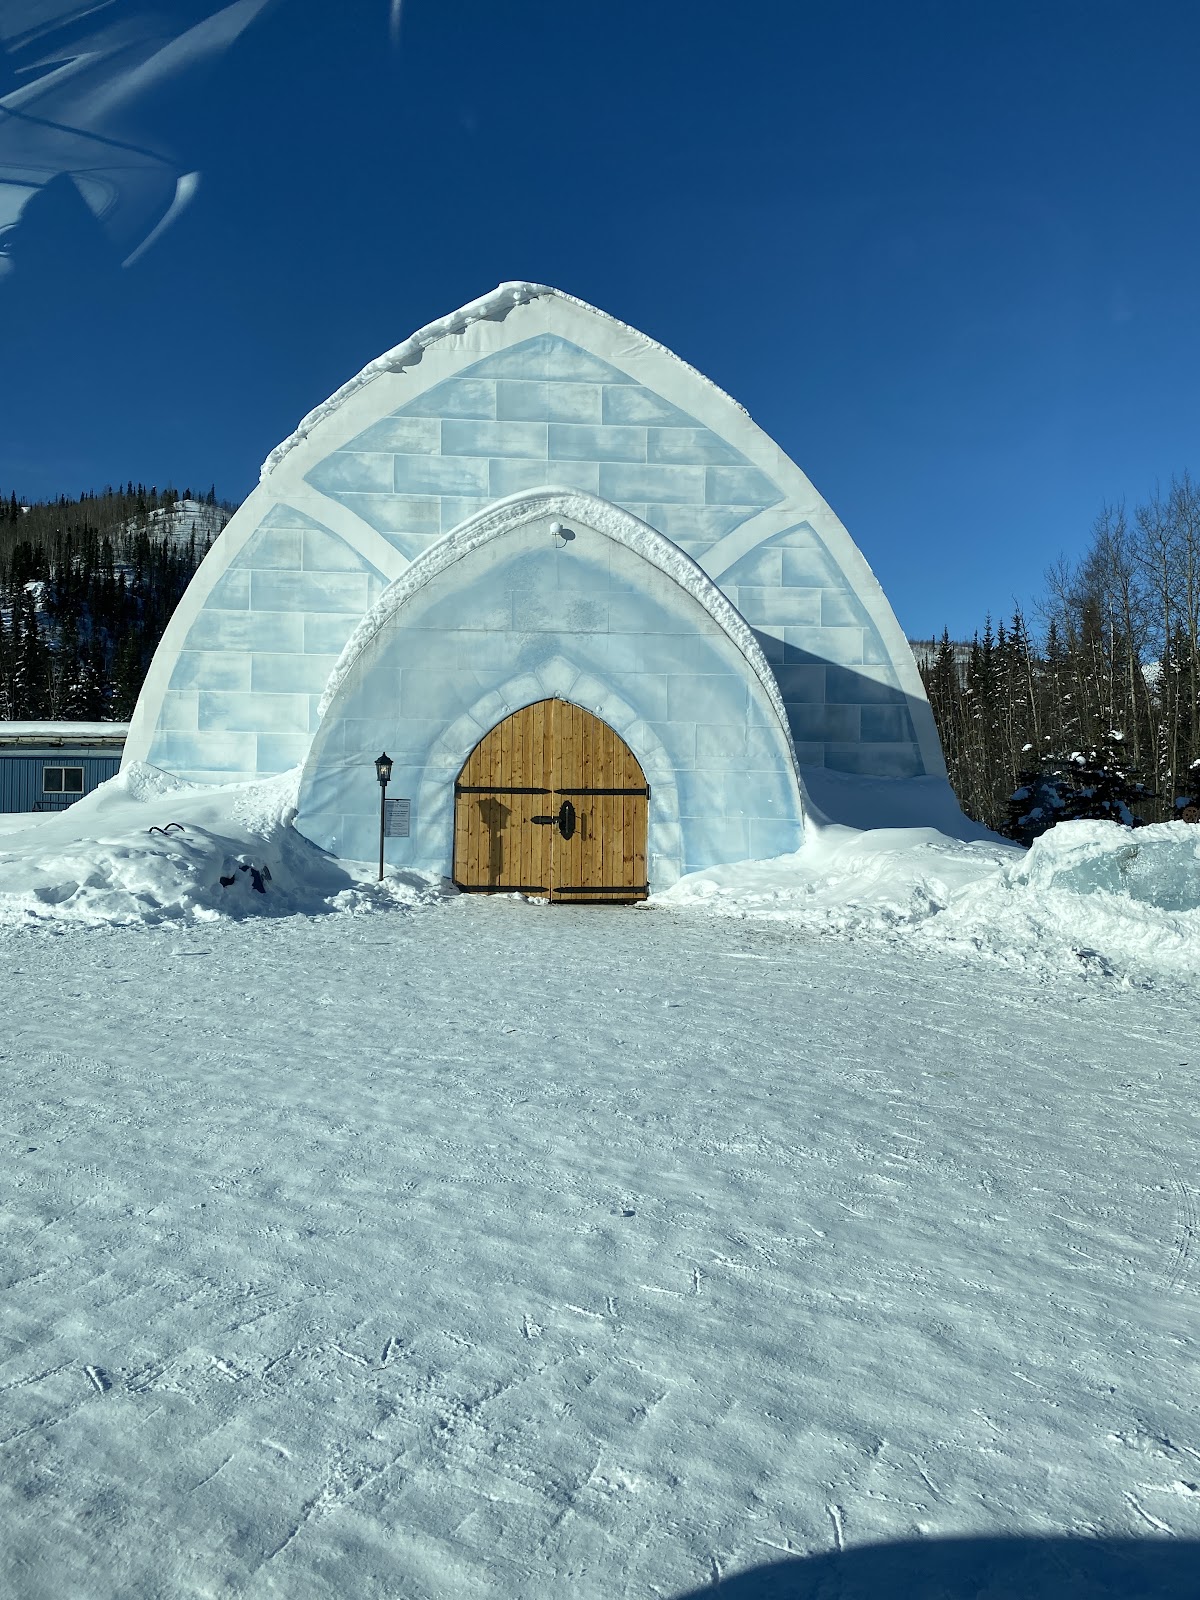
The Aurora Ice Museum sits at Chena Hot Springs, some distance north-east of Fairbanks, and it is a structure built of ice and snow — walls, columns, furniture, a bar, carved sculptures, chandeliers — kept below freezing all year round by refrigeration rather than by the weather. You can walk into it in July.
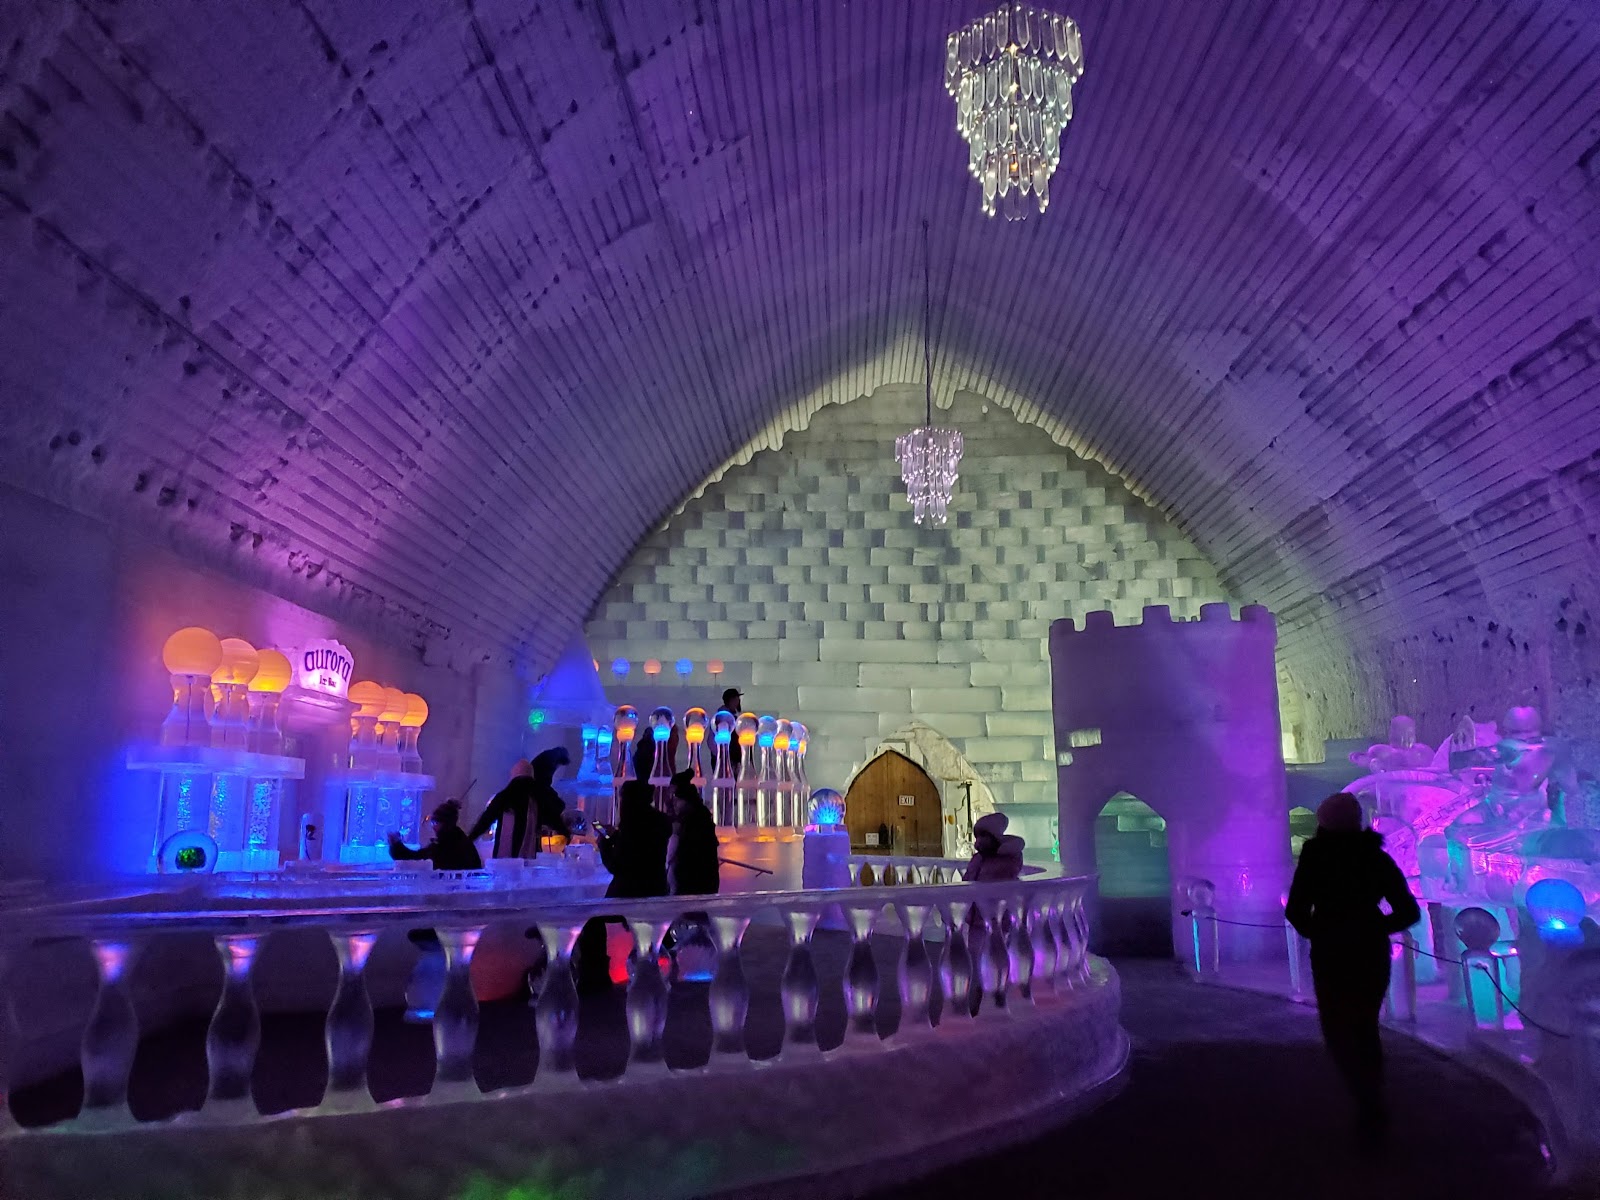
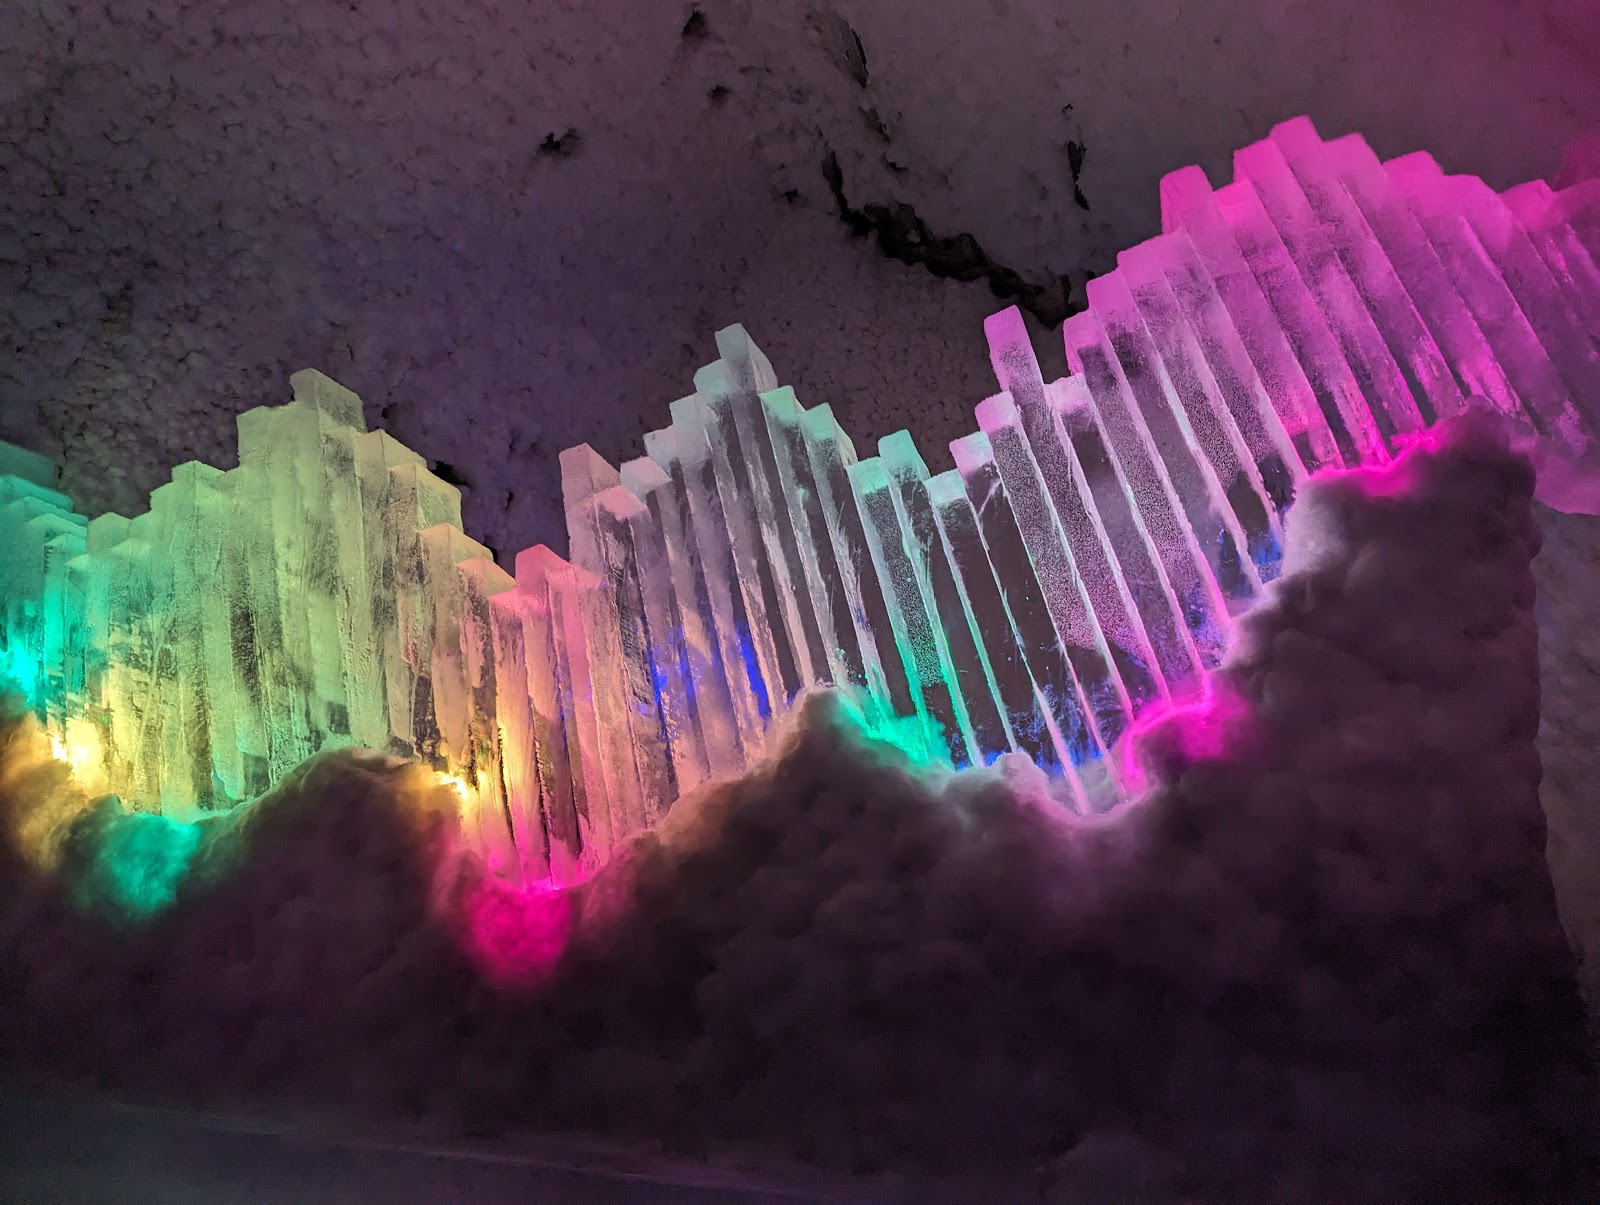
The photographic consequence of that is the whole guide. Ice is not like stone or timber or plaster. It transmits light rather than reflecting it, and it refracts and scatters what passes through, so a block of ice with a light inside it or behind it does not have a lit surface — it glows, all the way through, with the light distributed unevenly by every crack and bubble in the block.
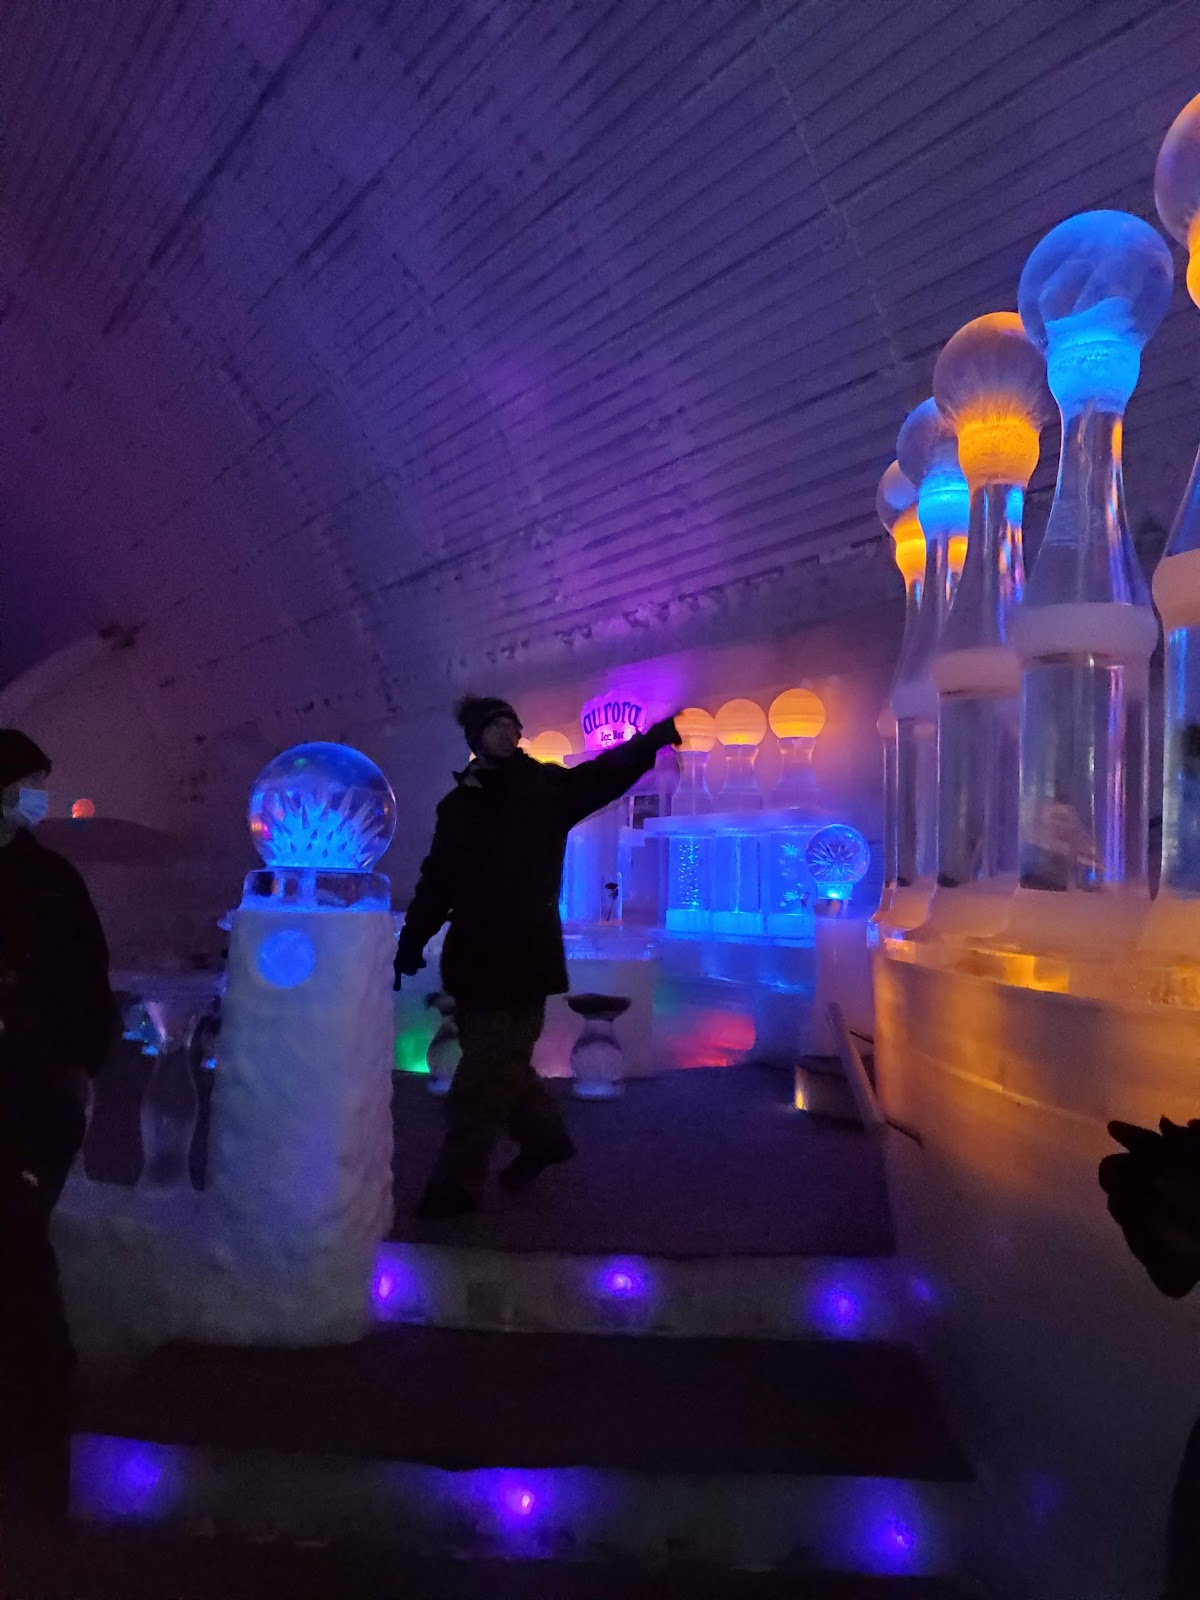
The lighting here is coloured, which is the convention in structures of this kind, and it is placed within and behind the ice. So the room is not a room with lights in it. The room is the light source.
That produces a space in which everything — every wall, every column, every carved surface — is a large, soft, saturated, coloured glow, predominantly in the blues and cyans that ice takes naturally and that coloured lighting reinforces.
And it produces one specific problem. A person standing in that room is lit entirely by blue light, and skin lit by blue light with no red in it looks dead. No white balance recovers it: correcting toward warm on a frame whose only illumination is a saturated blue LED amplifies noise in a channel with almost no signal and turns the ice a muddy grey at the same time.
So the frame worth building is the opposite of correction. Leave the ice exactly as blue as it is, and light the couple yourself, warm, so that they are the only warm thing in a room made entirely of cold light.
That is a complementary colour relationship — warm skin against saturated blue — and it is about as strong as a colour relationship gets. It also communicates precisely what the place is: they are two living, warm people standing inside a building made of frozen water.
It is a better frame than either alternative. Correcting the whole room toward neutral produces grey ice and a slightly odd couple. Letting the blue fall on their faces and accepting it produces a photograph of two people who look unwell.
What follows is how to build it, what else the building gives, and the practical business of photographing inside a freezer — which is a real set of constraints rather than a joke.
The Aurora Ice Museum at a glance
| Where | A refrigerated ice structure at Chena Hot Springs, north-east of Fairbanks |
| The frame | Two figures lit warm, with the ice left exactly as blue as it is |
| Why it works | Complementary colours, and it says what the building actually is |
| The trap | Skin lit by blue LED light has no red in it and cannot be corrected |
| Ask first | Whether flash and stands are permitted, how long you have, and the temperature |
Building the frame
First, establish what you are allowed to do, because an ice structure has real constraints and they are not negotiable.
Ask whether flash and lights on stands are permitted, and where. Ask how long a wedding party has inside, because a refrigerated space has an operating schedule and other visitors. And ask what the interior temperature actually is, because that number determines how long anybody can stay and how your equipment behaves.
Expect somewhere below freezing but well above outdoor winter conditions — a structure of this kind is typically held in the region of minus five or minus seven Celsius, cold enough that ice does not melt and warm enough that people can visit in ordinary clothes for a short time. That is a manageable working temperature and it is not the forty-below problem the region is famous for.
Second, choose the wall. Walk the room and find the section of ice that is most evenly and most strongly lit from within, with the fewest distracting elements in front of it — no bar, no sculpture edge, no doorway. What you want is a continuous glowing plane.
Vertical extent matters. A wall that glows from floor to ceiling lets you fill the frame with light and still have the couple occupy a modest part of it. One lit only at the base gives you a band, which is a lesser picture.
Third, set the ice’s exposure, and this is the decision that makes the frame. Meter the glowing wall and pull back — saturated colour reads strongest slightly under a correct middle exposure, so take it two thirds to one stop below where the meter puts it. A saturated blue metered correctly looks pale and washed; a stop under, it gains body and depth and looks the way the light actually looks in the room. Two stops under and it goes murky.
Watch the blue channel specifically. Strongly saturated blue light clips before anything else and once clipped it goes a flat dead cyan that cannot be recovered. Check a histogram on the blue rather than on the overall exposure.
Fourth, light the couple, and keep it small. One source, gelled warm — a full warming gel rather than a slight one, because the contrast you want is genuinely large — placed off to one side at about forty-five degrees and slightly above, close enough to be efficient at low power.
Small is essential for two reasons. A large modifier in a small ice room fills the space with light, lifts the ice toward neutral and destroys the very contrast you are building. And a big light source reflects off every ice surface in the room, which are numerous and specular, producing bright spots everywhere. A small hard source with a defined edge, feathered away from the walls, keeps the light where you put it.
Power it so the couple sit at roughly the same brightness as the ice or a touch above. If they are much brighter they look inserted; if much darker the frame reads as a blue room with two shadows in it.
Fifth, the position. Keep them a couple of metres off the wall if the room allows. Close to a strongly lit ice surface they will pick up blue on the shadow side no matter what your key is doing, which softens the contrast you are working for. Distance is the only control.
Sixth, the lens and aperture. Wide enough to include the glowing plane — twenty-four to thirty-five millimetres — and stopped down to f/4 or f/5.6 so the ice’s internal structure is rendered properly. That internal structure is the point: the cracks, bubbles, planes and carving marks inside a lit block are what make it read as ice rather than as a blue wall, and at f/1.4 they disappear into a wash.
That is the opposite of the long-and-open approach that works in cluttered venues. Here the background is the subject.
Seventh, and easily missed: get the carved detail in. An ice structure is carved, and the carving is what distinguishes it from a plain block. Include a column, a capital, a chandelier or a sculpted edge in the frame so the room reads as made rather than as quarried.
Total time once the wall is chosen: six or seven minutes. Time to choose the wall and set the exposure: fifteen minutes on arrival, ideally before the wedding party comes in, because the room is small and the party will fill it.
One variant worth having, and it takes twenty seconds. Turn the light off and expose only for the ice, with the couple as dark shapes against the glow. Two silhouettes inside a luminous blue room is a cleaner and more graphic picture, and in some rooms it is the better one. Make both.
What else the building gives
Beyond the one frame, an ice interior offers three things and demands one significant accommodation.
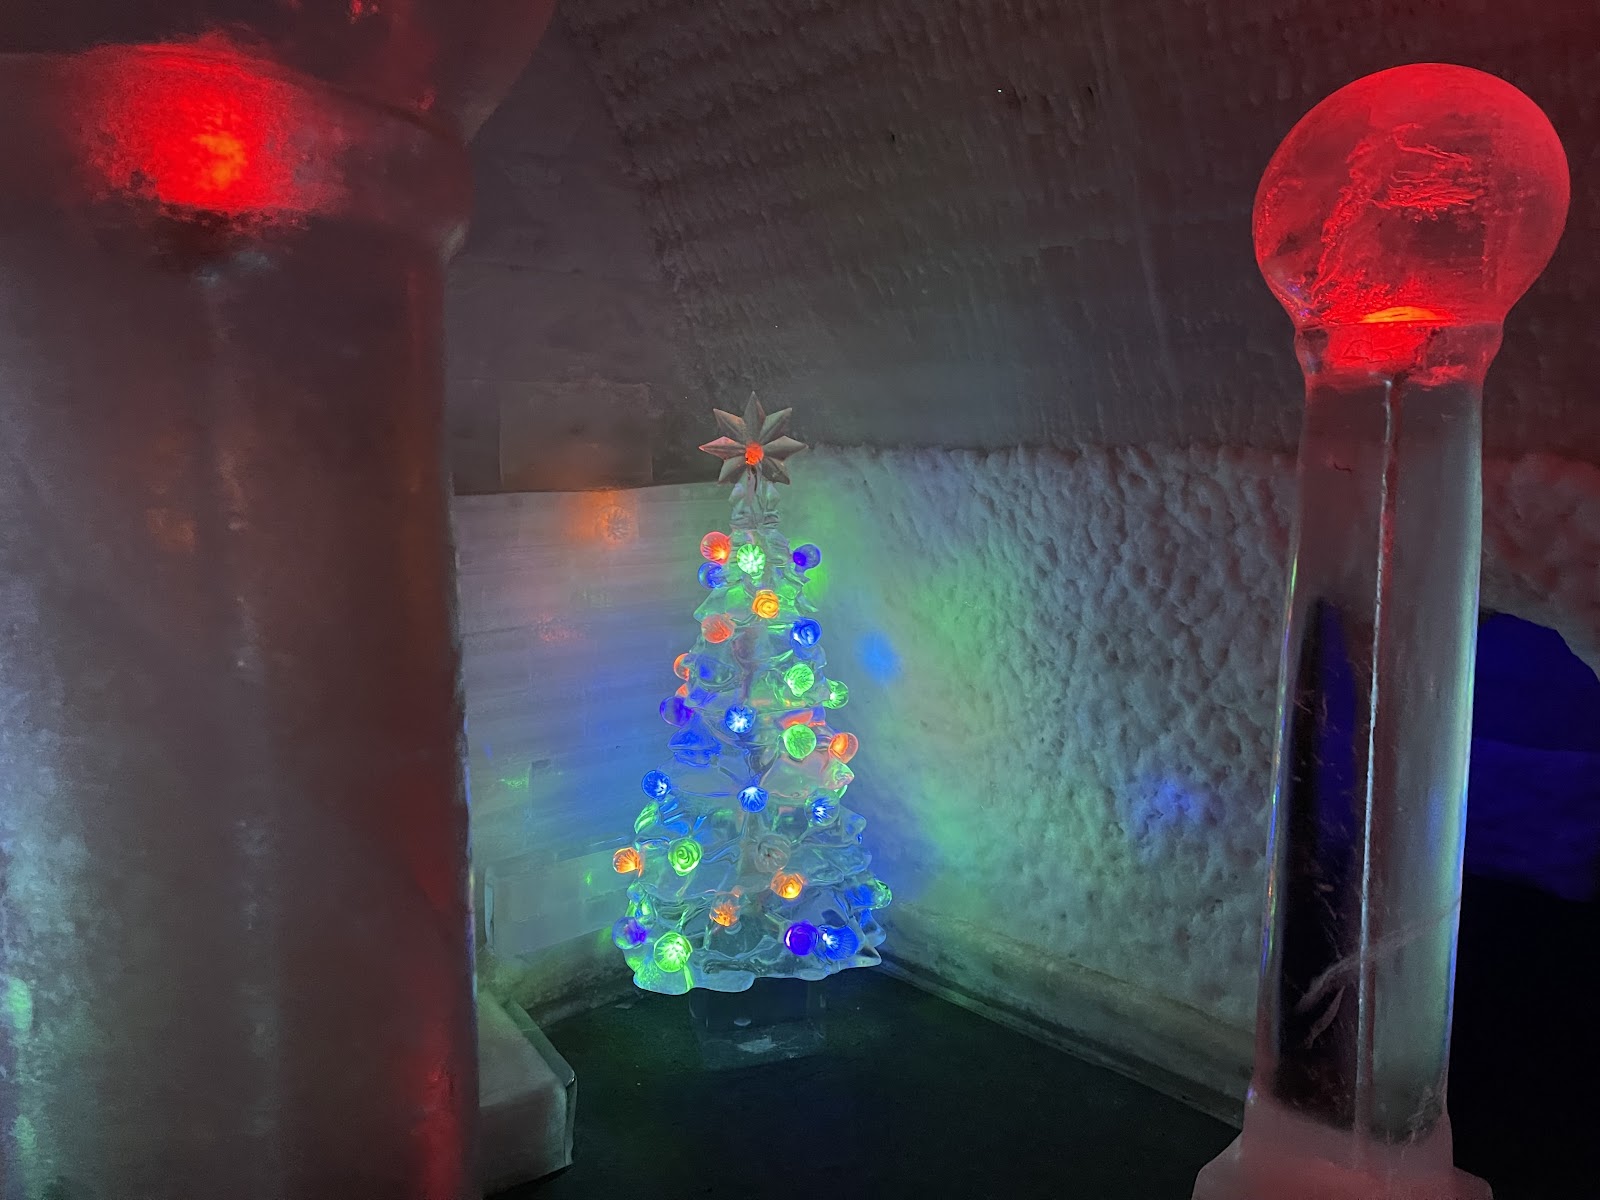
The first is the sculpture. A structure of this kind contains carved ice at various scales — figures, chandeliers, a bar, seating, sometimes larger set pieces — and carved ice lit from within is a genuinely beautiful close subject in its own right. It rewards being photographed tight and square, with the light left as it is, at an aperture that holds the internal structure.
Light coming through carved ice behaves like light through frosted glass: the carving’s thickness varies, so thin parts glow brightly and thick parts go dense, and the object records as a tonal map of its own geometry. That is why an ice sculpture looks three-dimensional in a photograph in a way a glass one often does not.
The second is the colour itself, used deliberately rather than as a background. If the lighting changes colour — and in structures like this it often cycles or varies by area — then you have several different rooms in one, and it is worth watching a full cycle before placing anybody. A frame in deep blue and the same frame in violet or green are different photographs, and one of them will suit the couple better than the others. Ask whether the colour can be held on one setting for a few minutes.
The third is the surfaces, which are specular. Polished ice reflects, which means the floor may give you a second dimmed image beneath a lit subject, and a wall at an angle may bounce a recognisable reflection. Both are usable and both mean you should check the frame for reflections of yourself and of your own light before making the exposure.
The accommodation is condensation, and at this venue it is the single most important practical matter. You will be moving equipment between a heated building or a vehicle and a refrigerated room, repeatedly, and every transition in the warm direction risks moisture forming on and inside the camera.
Going from cold into warm is the damaging direction. The standard practice is to seal the camera in a plastic bag while still in the cold, carry it in sealed, and let it reach room temperature over an hour before opening the bag. Do that every time, not just when you remember.
Going the other way — warm camera into cold room — fogs the front element briefly and then clears, and stiffens the focus and zoom rings. The fix is to let the camera cool for several minutes before you need it, which means carrying it into the ice structure early rather than arriving and shooting.
That last point has a scheduling consequence worth naming. A camera brought straight from a warm car into a below-freezing room will fog exactly when the wedding party walks in. Get there fifteen minutes ahead, put the bodies down somewhere in the cold, and let them equalise.
Two other cold notes. Battery capacity drops in cold, so carry more than you expect and keep spares in an inside pocket where your body heat maintains them — a battery that reads dead when cold will often recover when warmed. And the floor is ice, which means footing matters for you and for anybody in formal shoes. Move slowly, and expect the couple to need a hand.
Finally, the time limit is the couple rather than the camera. In ordinary wedding clothes, below freezing, ten or fifteen minutes is a realistic and comfortable maximum, and a bride in a sleeveless dress will be cold well before that. Plan the sequence — one frame, one variant, two details — as a five-minute operation with the positions already chosen, and have coats waiting at the door.
That is the whole discipline at this venue. It is not a difficult room to photograph. It is a room that punishes arriving without a plan, because you have five good minutes and no opportunity to explore.
Chena, the interior, and the year
The structure sits at a hot springs resort a substantial drive north-east of Fairbanks, in interior Alaska at a little under sixty-five degrees north, and the surrounding conditions shape a wedding day here more than the building does.
The latitude produces the most extreme light in this collection. At the summer solstice there are something close to twenty-two hours between sunrise and sunset and no true darkness at all, with the sun peaking at about forty-nine degrees — which means Fairbanks never gets the near-overhead sun that ruins the middle of the day further south. There is no bad hour in a northern summer. At the winter solstice there are under four hours of daylight and the sun peaks at about two degrees, so the entire day is a low, raking, warm-toned condition that a photographer anywhere else waits all day for.
That matters here for one specific reason: the ice structure is refrigerated and therefore identical in every season, while everything outside it is not. So the building is the constant and the season is the variable, and a couple should choose the season for what they want outdoors rather than for the ice.
If the aurora is wanted, the season chooses itself. Fairbanks sits under the auroral oval and is one of the more reliable places on the planet to see it, but the requirement is darkness — and there is no night here from about mid-May to late July. The season runs roughly late August to mid-April. Beyond that it needs clear sky, geomagnetic activity and patience, none of which can be promised on a given night, and staying several days materially improves the odds.
The hot springs are the other outdoor asset and they are at their most photogenic in cold. Water at bathing temperature in air at minus twenty-five produces dense steam that rises, drifts and catches any light passing through it — which makes a steaming pool in winter one of the most atmospheric subjects the region offers, and makes it nearly invisible in July. Backlight it, expose for the bright steam, and let the surroundings go dark.
Snow, in the cold half of the year, is the best natural fill light there is: fresh snow reflects a very high proportion of the light falling on it, so the ground becomes a reflector throwing light upward into faces, filling eye sockets without any card or flash. Two technical notes — a mostly white scene gets metered as mid-grey and comes back one to two stops under, so add compensation and check a histogram; and snow in shade is genuinely blue because it is reflecting a blue sky, which is correct rather than an error and should be left alone.
Extreme cold also produces optical effects worth watching for: around minus thirty-five and below, suspended ice crystals cause halos, bright spots either side of the sun, and vertical light pillars above lights, while ice fog forms where there is moisture and turns the air itself into a diffuser. None can be planned and all are worth shooting immediately.
The boreal forest around the site is white spruce, paper birch, aspen and poplar on the better ground, with black spruce on permafrost — stunted, thin and often leaning at angles because the ground beneath thaws unevenly, which produces a genuinely strange and very northern-looking forest. Pale birch trunks against snow are a superb graphic background.
Autumn is very early and very short. Birch and aspen turn gold in the second half of August and are largely down by mid-September, so the entire colour season is two to three weeks — and it coincides with the return of darkness and therefore with the start of the aurora season. Late August into early September is, for that reason, the single most photographically rich window of the year at this latitude: gold birch, dark spruce, a proper evening, the first aurora, and an ice structure that does not care what month it is.
March and early April are the other favourite among people who work here: still snow, still aurora season, but a rapidly lengthening day and far less severe cold, which makes everything outdoors more practical.
The two periods to be careful about are deep winter and break-up. From November to February the day is three to five hours long, the cold is extreme, and while the light is permanently beautiful the welfare constraint on anything outdoors is severe — a party in wedding clothes has minutes, not an hour. And late April into May is break-up: mud, grey snow and the least attractive weeks of the year.
Two logistical facts about the location itself. It is a real drive from Fairbanks on a road that matters in winter, which means travel time, winter driving conditions and a genuine contingency for guests are part of the plan rather than a detail. And summer in the interior brings mosquitoes in numbers that are not exaggerated, which will determine how long anybody stands anywhere outdoors between June and August.
Establish, finally, what else is available at the site in the season you choose, and what the indoor capacity is as a number. At this latitude in winter the heated interior is not a contingency for bad weather. It is the venue, and the ice structure is a five-minute excursion from it.
More frames from The Aurora Ice Museum
The Aurora Ice Museum wedding photography: common questions
What is the one frame?
Two figures lit warm by a source you brought, with the ice left exactly as blue as it is — so the couple are the only warm thing in a room made entirely of cold light. It is a complementary colour relationship, which is about as strong as a colour relationship gets, and it says precisely what the building is: two living warm people inside a structure of frozen water.
Why not just correct the colour?
Because you cannot, and trying wrecks both halves of the frame. Skin lit by saturated blue LED light has almost no red falling on it, so correcting toward warm amplifies noise in a channel with no signal while simultaneously turning the ice a muddy grey. The two workable options are to light the people warm and leave the ice blue, or to leave the light off entirely and shoot them as silhouettes against the glow. Letting blue fall on their faces and accepting it produces a photograph of two people who look unwell.
How should the ice be exposed?
Two thirds to one stop under where the meter puts it, because saturated colour reads strongest slightly underexposed — metered correctly a glowing blue wall looks pale and washed, and a stop under it gains body and depth. Watch the blue channel specifically on a histogram, because strongly saturated blue clips before anything else and once clipped goes a flat dead cyan that cannot be recovered.
What light should you bring?
One small source, gelled strongly warm, at about forty-five degrees and slightly above, close and at low power. Small matters for two reasons: a large modifier in a small ice room fills the space, lifts the ice toward neutral and destroys the contrast you are building, and a big source reflects off every specular ice surface in the room. Feather it away from the walls, and keep the couple a couple of metres off a strongly lit surface, because close to it they will pick up blue on the shadow side whatever the key is doing.
What aperture?
f/4 or f/5.6 — stopped down, not open. The cracks, bubbles, planes and carving marks inside a lit ice block are what make it read as ice rather than as a blue wall, and at f/1.4 they dissolve into a wash. Here the background is the subject, so it has to be rendered properly. Include a carved element too — a column, a chandelier, a sculpted edge — so the room reads as made rather than quarried.
What are the practical constraints?
Condensation and time. Going from cold into warm is the damaging direction, so seal the camera in a bag while still in the cold and let it warm over an hour before opening — every time. And carry equipment into the ice structure fifteen minutes early so it equalises, or it will fog exactly as the wedding party walks in. The real limit is the couple: in ordinary wedding clothes below freezing, ten or fifteen minutes is the comfortable maximum, so plan the sequence as a five-minute operation with positions already chosen, and have coats at the door.
More Alaska venue guides
We are writing a photographer’s guide to every venue we would happily shoot in Alaska. Here are three more, plus the full index:
- The Chena Hot Springs Resort, Fairbanks: The One Decision That Governs Everything
- The Northern Lights Estate, Fairbanks: The Light Through the Day
- 49th State Brewing Co, Healy: The Building’s Own Logic
Planning a wedding at The Aurora Ice Museum?
Five good minutes, planned in advance. Tell us your date.